What does epoxy floor repair actually involve?
Epoxy floor repair is the process of removing or stabilizing the failed parts of an existing coating, re-preparing the concrete underneath, and bonding new material over it so the floor is sound again. It is not always a full replacement — in many cases we can spot-repair a section and recoat, which costs less and takes less time than starting over.
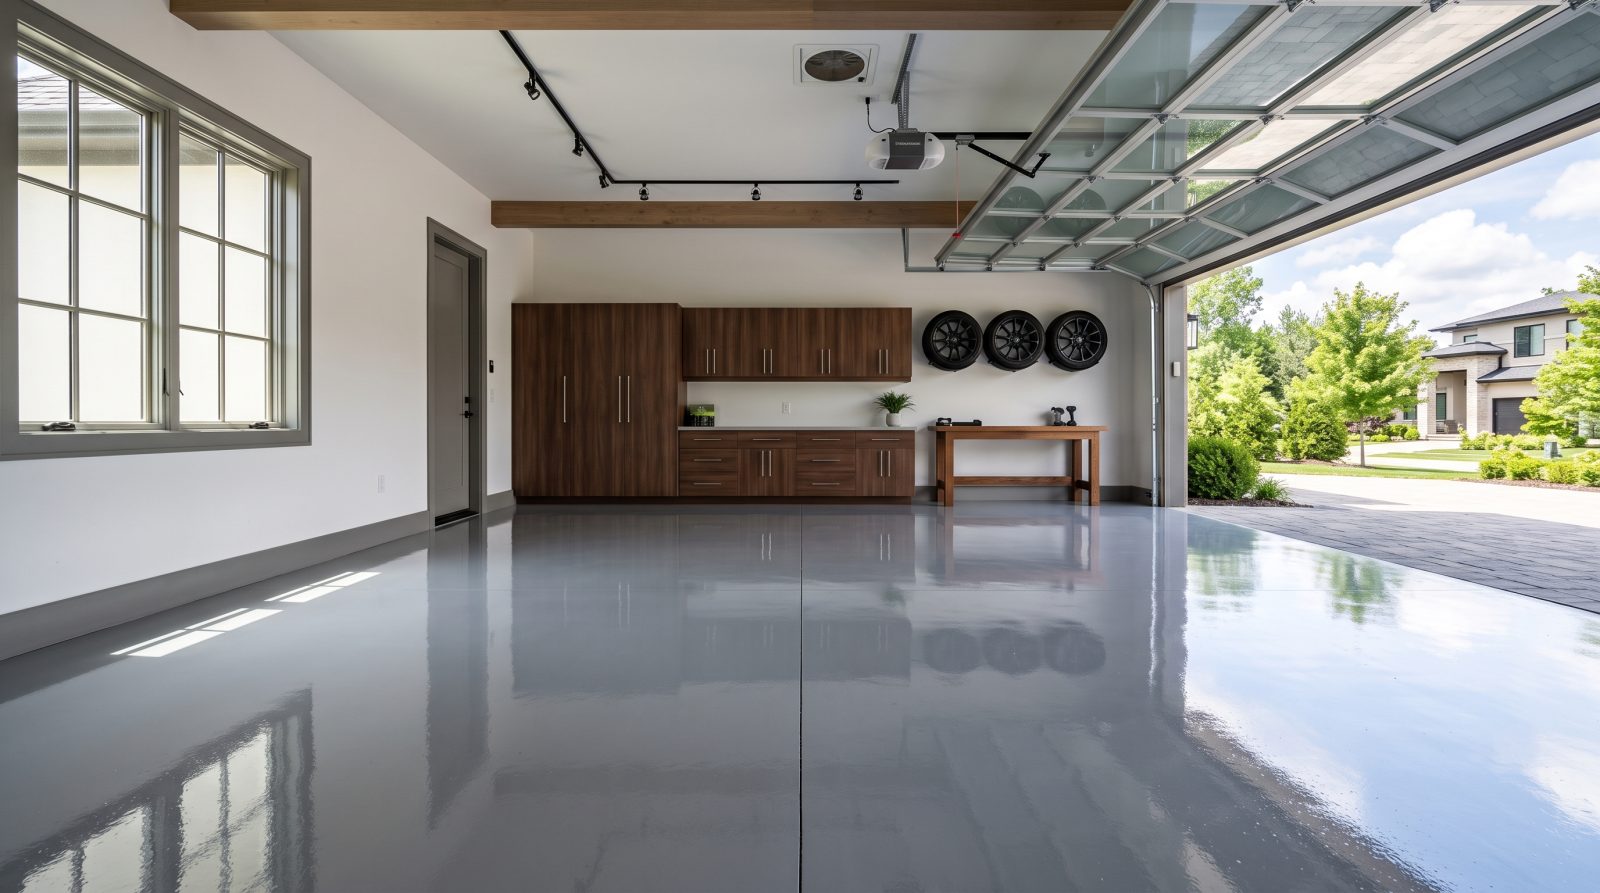
The work falls into three general categories. A spot repair targets a localized problem: a chipped corner, a gouge from a dropped tool, or a small area that delaminated. A recoat refreshes a floor whose coating is mostly intact but has worn thin, yellowed, or lost its sheen — the surface is abraded and a new top coat is applied. A full resurface is used when the original coating is failing across most of the floor or was poorly installed; the old material is ground off and a new system is built from the concrete up.
Which path makes sense isn't a guess. We test how well the existing coating is still bonded, look at the moisture behavior of the slab, and check whether the original prep was the root cause. Matching the repair to the real problem is what keeps the fix from peeling again a year later.
- Spot repair: fix and blend a localized chip, gouge, or delaminated patch
- Recoat: abrade a sound but worn coating and apply a fresh top coat
- Full resurface: grind off a failing coating and rebuild the system
- Diagnosis first: bond test, moisture check, and root-cause review before any product goes down
Why do epoxy floors peel, bubble, or chip?
Most epoxy failures trace back to one of a few causes, and almost all of them are about what happened (or didn't happen) before the coating was applied. Knowing the cause matters, because recoating over an unaddressed problem just buys you a few months before it fails again.
The most common culprit is inadequate surface preparation. Epoxy bonds mechanically to a properly profiled concrete surface — typically opened up by diamond grinding or shot blasting to roughly a CSP 2–3 profile. When a coating is rolled over a smooth, sealed, or merely acid-etched slab, it can peel away in sheets later. Moisture is the second big one: concrete slabs without a vapor barrier, or in humid below-grade spaces, can push water vapor up through the slab and break the bond, causing bubbling and delamination. Other causes include applying over oil or contaminants, coating in temperatures or humidity outside the product's window, hot-tire pickup from vehicles parked on a thin or under-cured film, and simple UV yellowing on floors that get direct sunlight.
When we assess a floor, we're reading these symptoms backward to the cause. Peeling in clean sheets often points to a prep or moisture problem; bubbling clusters suggest vapor or trapped air; hazy spots that lift under hot tires usually mean the coating was too thin or not fully cured. The repair plan is built around fixing that underlying issue, not just hiding the damage.
- Poor prep — coating applied over smooth, sealed, or only acid-etched concrete
- Moisture vapor pushing up through a slab with no vapor barrier
- Contamination — oil, grease, or dust left on the slab before coating
- Application outside the product's temperature/humidity window
- Hot-tire pickup on a film that was too thin or under-cured
- UV yellowing on coatings exposed to direct sunlight
Can my floor be recoated, or does it need a full resurface?
A floor is usually a good candidate for recoating when the existing coating is still well bonded across most of the surface and the damage is cosmetic — worn sheen, light scratching, minor discoloration, or a few small chips. In that case we mechanically abrade the surface to give the new top coat something to grip, repair the small defects, and apply a fresh coat. This is faster and more economical than a tear-out.
A full resurface is the honest call when the coating is delaminating over a large area, when there's an active moisture problem the old coating was hiding, or when the original installation skipped proper prep and the bond can't be trusted anywhere. Recoating a failing floor doesn't fix the failure — the new layer is only as strong as what it's stuck to. We won't recommend a recoat we don't believe will hold.
We determine this on site with a few simple checks: a bond/adhesion test on the existing coating, a moisture assessment of the slab, and a visual map of how much of the floor is actually compromised. You'll get a straight answer about which approach fits your floor and why, along with the trade-offs of each.
How we repair and resurface a floor, step by step
Every job follows the same disciplined sequence, because skipping steps is exactly what causes coatings to fail. The details are scaled to the size of the repair, but the logic is the same whether we're fixing one corner or resurfacing a whole garage.
Surface preparation is the part that does the heavy lifting. For a recoat we mechanically abrade the existing coating; for a resurface we diamond-grind or shot-blast down to bare concrete and open it to a sound profile. Cracks are routed out and filled, spalled areas are patched, and the slab is cleaned of all dust and contaminants. Only then does coating go down — a primer or base coat appropriate to the slab, followed by the build and top coats, with any decorative flake or non-slip aggregate broadcast at the right stage.
Cure time is real and worth planning around. As a general industry guideline, many epoxy systems are ready for foot traffic in roughly 12–24 hours and for vehicle traffic in about 3–7 days at typical room temperatures near 70°F, with full chemical cure taking up to about a week. Colder temperatures slow cure significantly; high humidity can interfere with certain products. We confirm the exact cure schedule for the specific system used on your floor.
- Assess: bond test, moisture check, and root-cause diagnosis
- Prep: abrade or grind to a sound profile (typically CSP 2–3 for new systems)
- Repair: rout and fill cracks, patch spalls, decontaminate the slab
- Coat: prime, build, top coat — broadcast flake or anti-slip aggregate as specified
- Cure: protect the floor per the system's schedule before returning it to use
What does epoxy floor repair typically cost?
Costs vary widely with the size of the area, the condition of the slab, and which approach the floor needs, so any number here is a typical industry range — an estimate, not a quote. As a rough guide, professional epoxy and resurfacing work commonly falls somewhere in the range of about $3 to $12+ per square foot, with simple recoats landing at the lower end and full grind-and-rebuild systems with decorative finishes at the higher end. A small spot repair may be priced as a flat minimum rather than by the foot.
Several factors move the number. A floor that needs full diamond grinding, crack and spall repair, or moisture mitigation costs more than a straightforward recoat of a sound surface. Decorative options like full flake broadcast, metallic finishes, or polyaspartic/polyurea top coats add to the material cost. Access, the amount of prep required, and how much old coating has to come off all factor in as well.
The only way to give you a real number is to look at the floor. We'll measure the area, assess the slab and existing coating, and walk you through an itemized estimate so you understand what you're paying for and why — no surprise add-ons after work starts.
- Typical industry range: roughly $3–$12+ per square foot (estimate, not a quote)
- Recoats sit lower; full grind-and-rebuild systems sit higher
- Moisture mitigation, heavy crack/spall repair, and decorative finishes add cost
- Spot repairs may be a flat minimum rather than per square foot
- A real number requires an on-site measurement and assessment
How long does a repaired or resurfaced floor last?
A properly prepped and correctly cured epoxy or resurfacing system on a sound slab can last many years of normal garage and light-shop use. The honest caveat is that longevity is driven almost entirely by two things: how well the concrete was prepared before coating, and whether any moisture issue in the slab was addressed. A coating done right on a clean, profiled, dry slab holds up; a coating rushed over poor prep is on borrowed time no matter the brand.
Top-coat choice also affects wear and appearance. Standard epoxy is hard and chemical-resistant but can yellow under UV; polyaspartic and polyurea top coats are more UV-stable and abrasion-resistant, which is why many garage systems use an epoxy base with a polyaspartic top coat. We'll match the system to how the floor is actually used.
You can extend the life of any coating with simple care: clean up oil and chemical spills promptly, avoid dragging sharp metal, use a soft squeegee or microfiber for cleaning, and place mats where hot tires sit if the floor sees a lot of vehicle traffic. We'll leave you with care guidance specific to the finish we install.